Project Folders
Learn how to use folders to organize your projects in the Map tool.
Project Folders help keep your map workspace organized by allowing you to group projects based on location, timing, or other relevant characteristics.
In this article, you’ll learn how to:
If you haven't created a project yet, be sure to check out this article for more information!
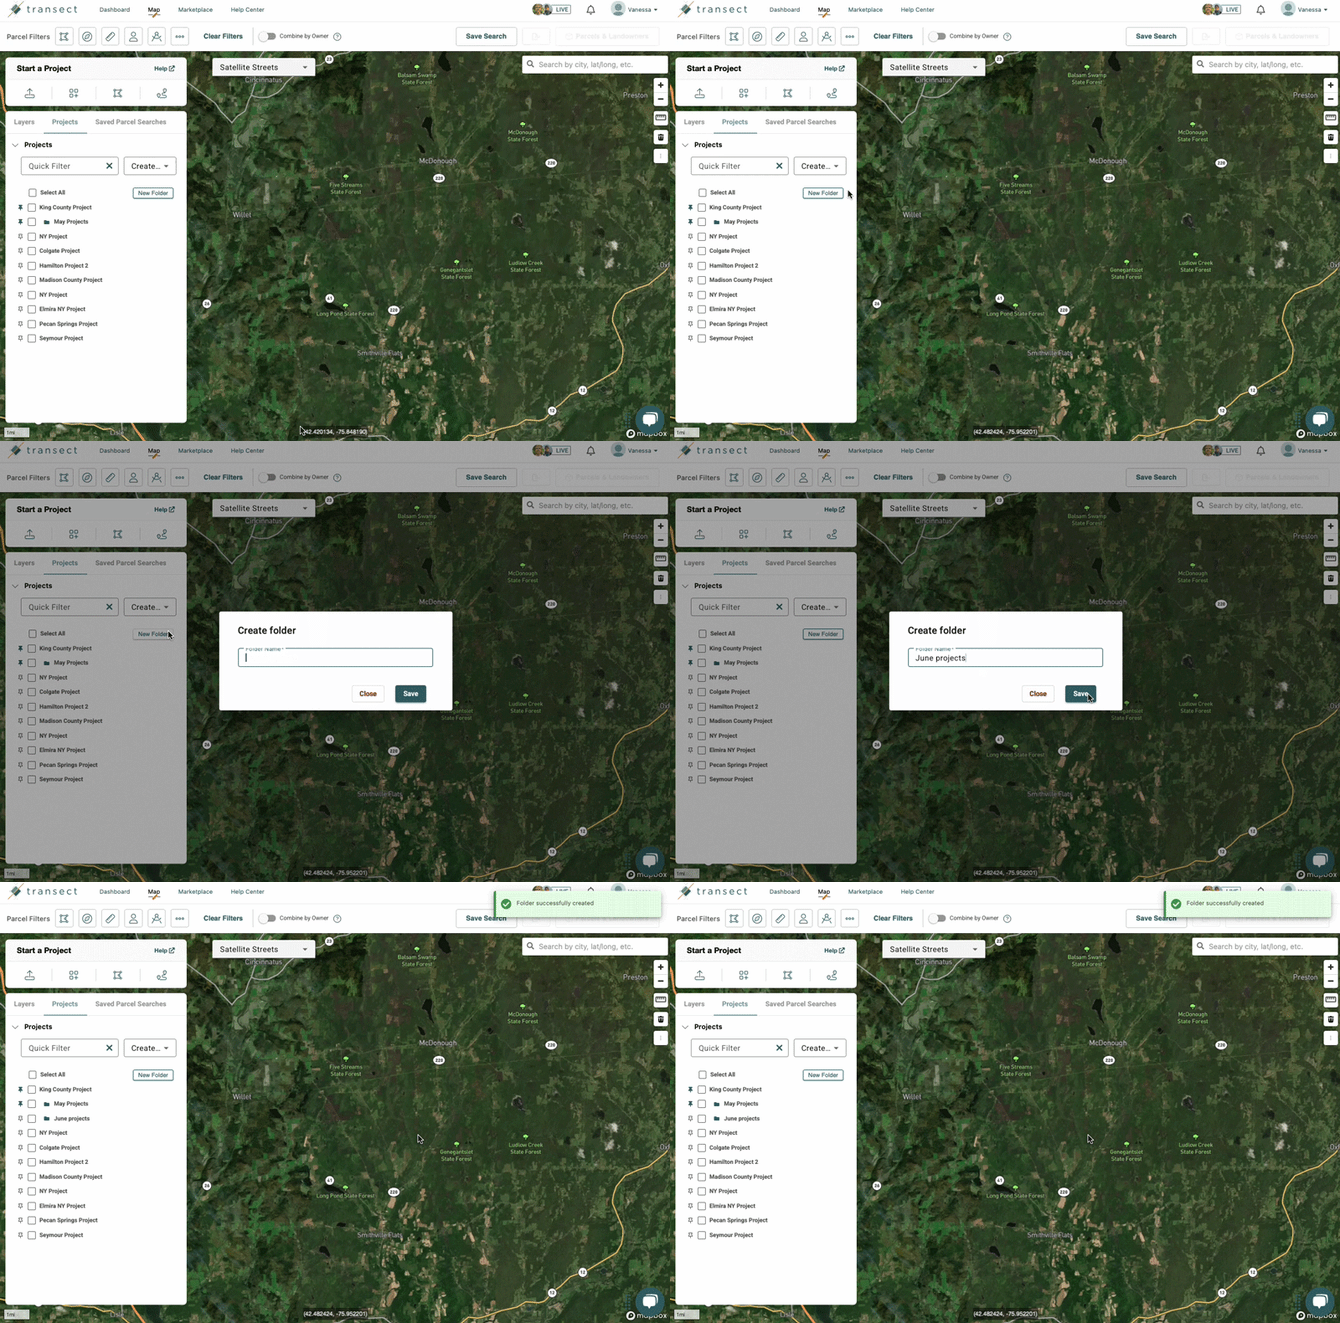
Creating a Folder
- Navigate to the Map from the top navigation bar.
- In the Layers modal, select the Projects tab.
- Click New Folder and add a name for it.
- Select Save when finished.
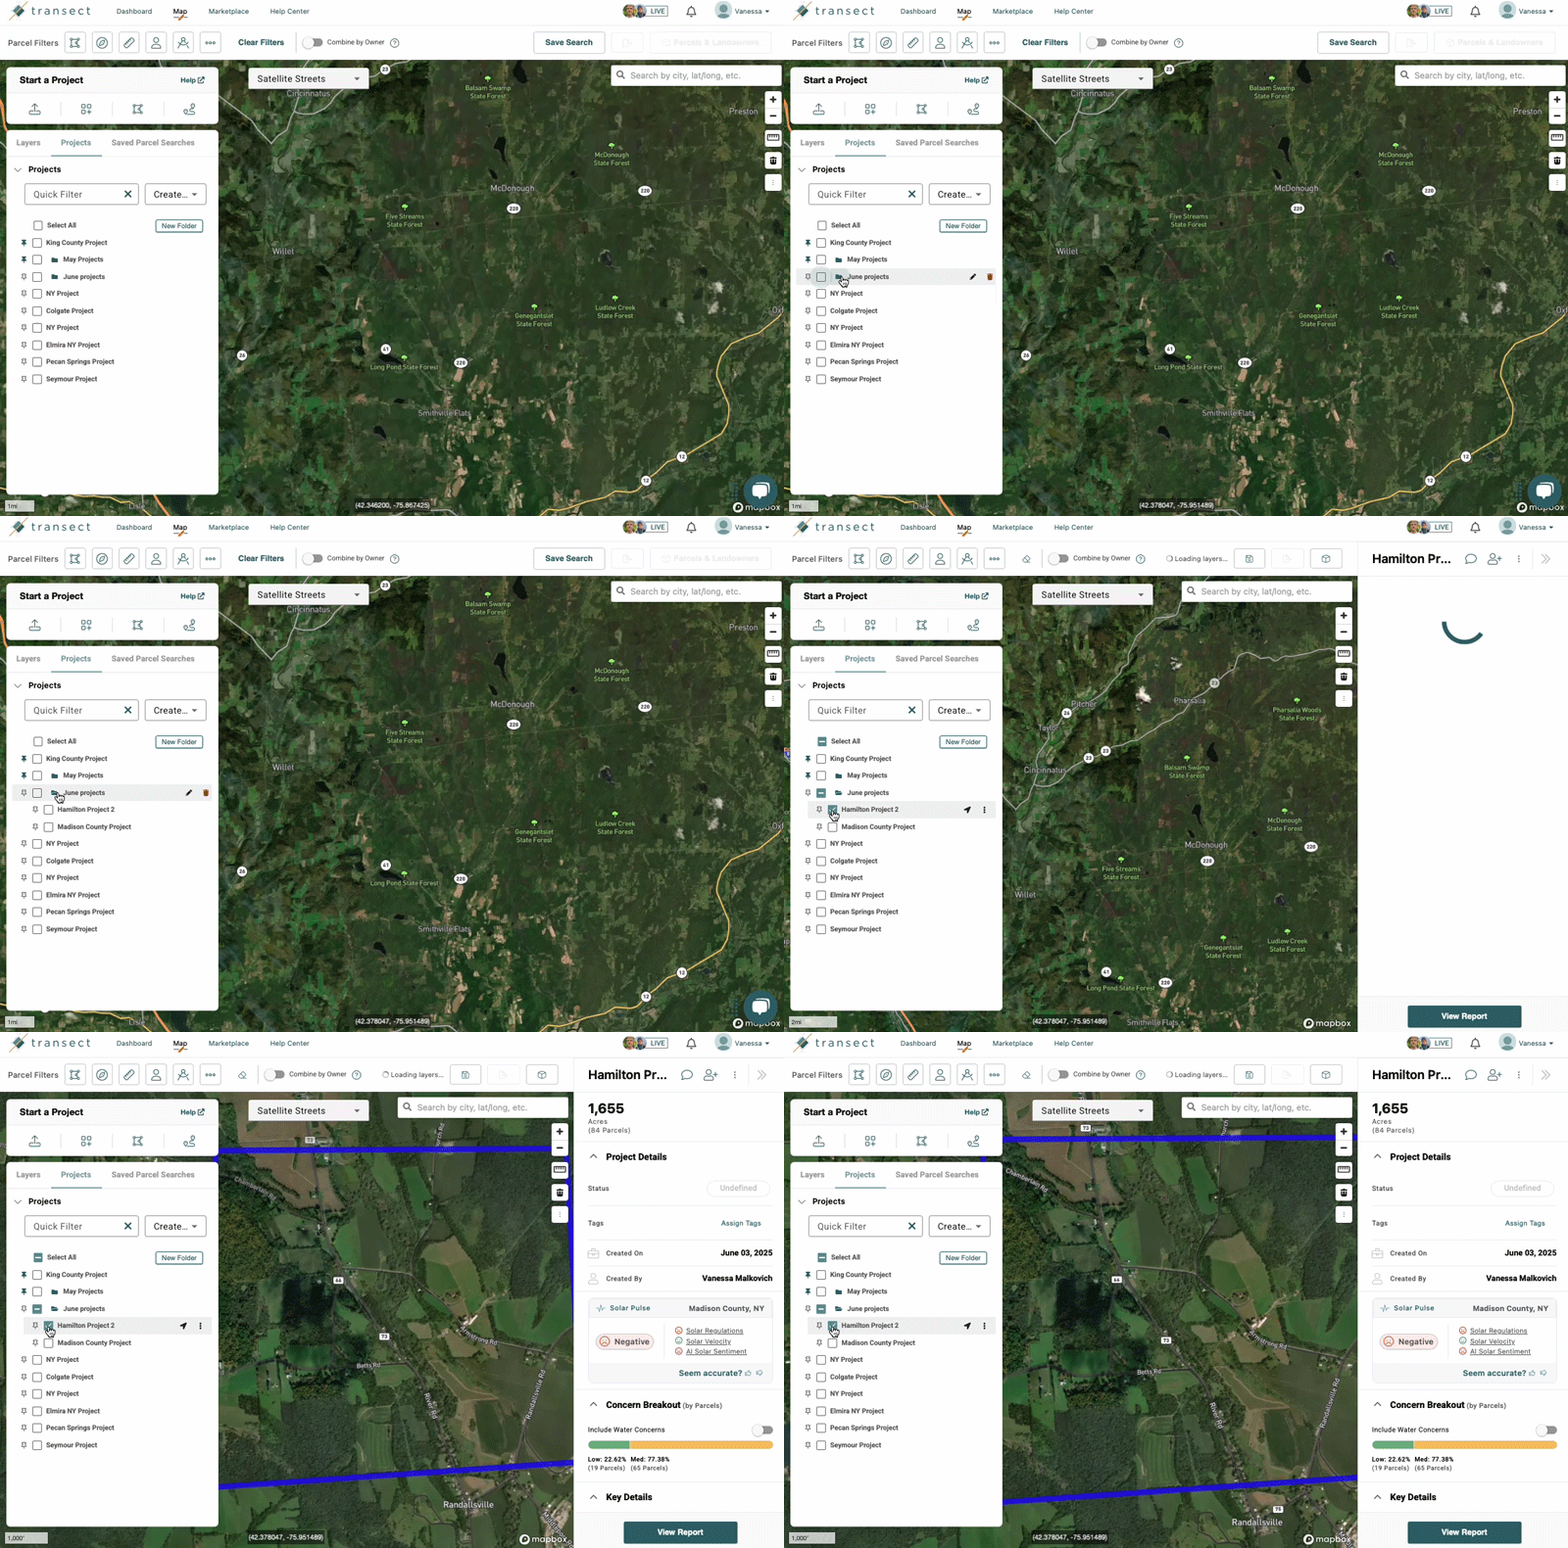
Viewing a Folder
- Navigate to the Map from the top of any page.
- In the Layers modal, select the Projects tab.
- Click the green folder icon
to the left of the folder name to open it.
- To close the folder, click the green folder icon again.
Adding or Removing Projects from a Folder

After creating a folder, drag and drop a project into the folder to add it. To remove it from the folder, drag and drop the project back into the list.
Deleting a Folder
To delete a folder, click the trashcan icon to the right of the folder name. A pop-up window will confirm that you want to delete the folder. Select Yes to confirm the deletion.

Folders containing projects that have associated Transect Reports cannot be deleted.
